In a completely different direction from previous posts, this post will detail some initial findings in exploring the world of Software Defined Radio (SDR), which has been around for quite some time. This post details initially setting up an antenna, SDR, and software to receive Automatic Picture Transmission (APT) signals from the National Oceanic and Atmospheric Administration (NOAA) satellites which offer transmission of weather imagery from space.
Hardware and Software
This tutorial will set up the software required on a MacBook Pro running OSX. Specifically, the operating system version running is OSX 10.14.4 (Mojave). The following software components will be used - install each of these components prior to proceeding:
- CubicSDR: Software defined radio tuner and signal capture.
- Soundflower: Enables creation of virtual audio devices for piping audio between software components.
- WXtoImg: Translates radio frequency signal into image data. The software is no longer maintained but the download link still works in the link attached.
In addition, the following hardware components are needed:
- RTL-SDR: Software defined radio USB device - the link is an Amazon sale which includes the antenna mentioned below as well as the USB device.
- Rabbit Ear Antenna: Antenna used to attach to the SDR device - can be any kind with expandable antennae.
Theory of Operation
The following configuration (software + hardware) will be realized in this tutorial:
 |-----------|
 | Satellite |
 |-----------|
       ^
       |
       v
  |---------|
  | Antenna |
  |---------|       |------------------------------------|
       ^            | MacBook Laptop                     |
       |            |                                    |
       v            |  |----------|      |------------|  |
|------------|      |  | CubicSDR | <--> | Soundcloud |  |
|  RTL-SDR   | <--> |  |----------|      |------------|  |
| USB Device |      |                          ^         |
|------------|      |                          |         |
                    |                          v         |
                    |                    |------------|  |
                    |                    | WXtoImg    |  |
                    |                    |------------|  |
                    |                                    |
                    |------------------------------------|
The theory of operation in the above image is that the antenna will capture radio waves from the NOAA satellite and pass this information into the RTL-SDR tuner, which will in turn pump the information into the CubicSDR software. Using the CubicSDR software, capture ranges will be set to tune the radio to the frequency of the NOAA satellite and start to output the audio frequency information into the Soundcloud audio device (and your laptop speakers). The WXtoImg software, listening to the Soundcloud virtual audio device (microphone) will take this information and decode it into a weather image based on the data being sent from the satellite, which will produce the weather picture once the data transmission has completed (the satellite is out of range).
Antenna Setup
Rabbit ear antennas are not the best method to use for capturing the signals transmitted from the NOAA satellites but can in fact work. Automatic Picture Transmission (APT) signals can be received using a Right-Hand Circularly Polarized antenna tuned to a frequency of 137 MHz. It turns out that a rabbit ear antenna can be configured in a “V” shape to receive the signal transmitted by the satellites.
Configure your antenna, ideally in a large open/unbostructed space, in a “V” shape, parallel to the earth ground, and with each antenna expanded roughly 20” in length, the distance between the antenna points roughly 34.5”. The “V” should be pointed due north. A simple diagram below details the dimensions:
      SIDE VIEW            |           TOP VIEW
                           |
         antenna           |         \  <34.5">  /
        --------           |       ^  \         /  ^
support |                  |      20"   \     /   20"
        |                  |       v     \  /      v
---------------------      |              XX
    earth ground           |
Once the antenna is set up, plug it into the SDR USB device and plug the USB device into your laptop.
Soundflower Virtual Audio Device Creation
Once the Soundflower software is installed you won’t see any application, but instead it has installed drivers and functionality to enable the creation of virtual audio devices. On the Mac, search (Command+Spacebar) for and launch “Audio MIDI Setup.app”. Once the dialog box opens, click the plus “+” sign in the lower left and select “Create Multi-Output Device”. For the device settings, specify the following:
- Master Device: Build-in Output
- Sample Rate: 48.0 kHz
Ensure the “Soundflower (2ch) and “Built-in Output” Audio Devices are checked, and “Drift Correction” is only checked on the “Soundflower (2ch)” Audio Device. This enables audio to continue to flow through your laptop speakers while also splitting it to flow to any device connected to the Soundflower 2-channel virtual device.
Your multi-output device is now configured and you can close the MIDI Setup dialog and proceed.
WXtoImg Configuration
WXtoImg is the software that will receive the audio and translate it into image data. We will need to perform a few tasks to initialize the WXtoImg software, especially if this is the first time you’ve launched the software.
The WXtoImg software downloads Keplers for positioning and prediction of overpasses. Once you’ve launched the applicationi for the first time and chosen your location, select “File” -> “Update Keplers”, which will get the latest positional data for the satellites.
Next, we will need to configure the input device (microphone) for the software, which is where it will recieve the audio and perform the translation into image data. Navigate to “Options” -> “Recording Options…”. The only thing you should need to change here is to select the “Soundflower (2ch)” device from the “Common recording options:” -> “soundcard” drop down. Once selected, click “OK” to save the changes. Now all audio will be pumped into the WXtoImg software by way of the Soundflower virtual audio device (the other end producing the audio being the CubicSDR software which will configure in the next section).
To discover when your next available NOAA satellite pass is going to occur, navigate to “File” -> “Satellite Pass List…” which will list the next available pass. This will tell you which NOAA satellite will be available at which time, and most importantly, the frequency that the satellite will be transmitting on. Take note of this frequency (will be ~137.X MHz frequency) as we will be using it in the next section.
Finally, set up the WXtoImg software to auto record when the satellite is in range and audio is being produced. Navigate to “File” -> “Record…”, and when the dialog appears, leave the default options and select the “Auto Record” button. At this point, the software will be ready and wait for the satellite availability and audio signal. You’re now ready to get your tuner aligned.
CubicSDR Configuration
The final step is to tune the SDR to the frequency of the satellite that will be passing overhead. Launch the CubicSDR software. Once loaded, select the “Generic…” device for the RTL-SDR drive. When the tuner pane opens, in the upper left, select “FM” for the modulation type. Then, begin typing the frequency of the satellite (don’t click any buttons, just start typing, and a dialog will open allowing you to input the frequency). Finish typing the frequency and press Enter. The window will center on the frequency typed.
In the upper right corner, for the “Bandwidth” parameter, update the value to be 40,000 to configure a 40 kHz bandwidth. Then, click on the center frequency for the satellite in the bottom waterfall chart to tune to the frequency of the satellite. You may end up a bit offset from the desired frequency and can fine-tune using the frequency value in the upper right window of the software.
The only thing left to do is wait for the satellite pass overhead.
Success and Output
Once you’ve configured the above, the WXtoImg application should start automatically recording the transmission data when the satellite is within range, and you should see/hear audible beeps from the satellite in your CubicSDR application. If all goes well, this will be your first contact with the NOAA satellite!
Note: You may need to fine-tune the frequency up/down based on the doppler shift effect, but in general you should be within range of at least most of the signal. Make sure when the recording starts, the volume bar in the lower-right corner of the WXtoImg software is in the ~50% range and colored green - if it is too low/high, adjust your laptop volume to ensure the audio is appropriately piped over to the software so it can read the radio waves.
Below are some images of the application output as well as some (very) sparse data I was able to capture on the first try which was a cloudy day with the antenna parked under trees. The satellite sending the data was NOAA 18:
Software Output
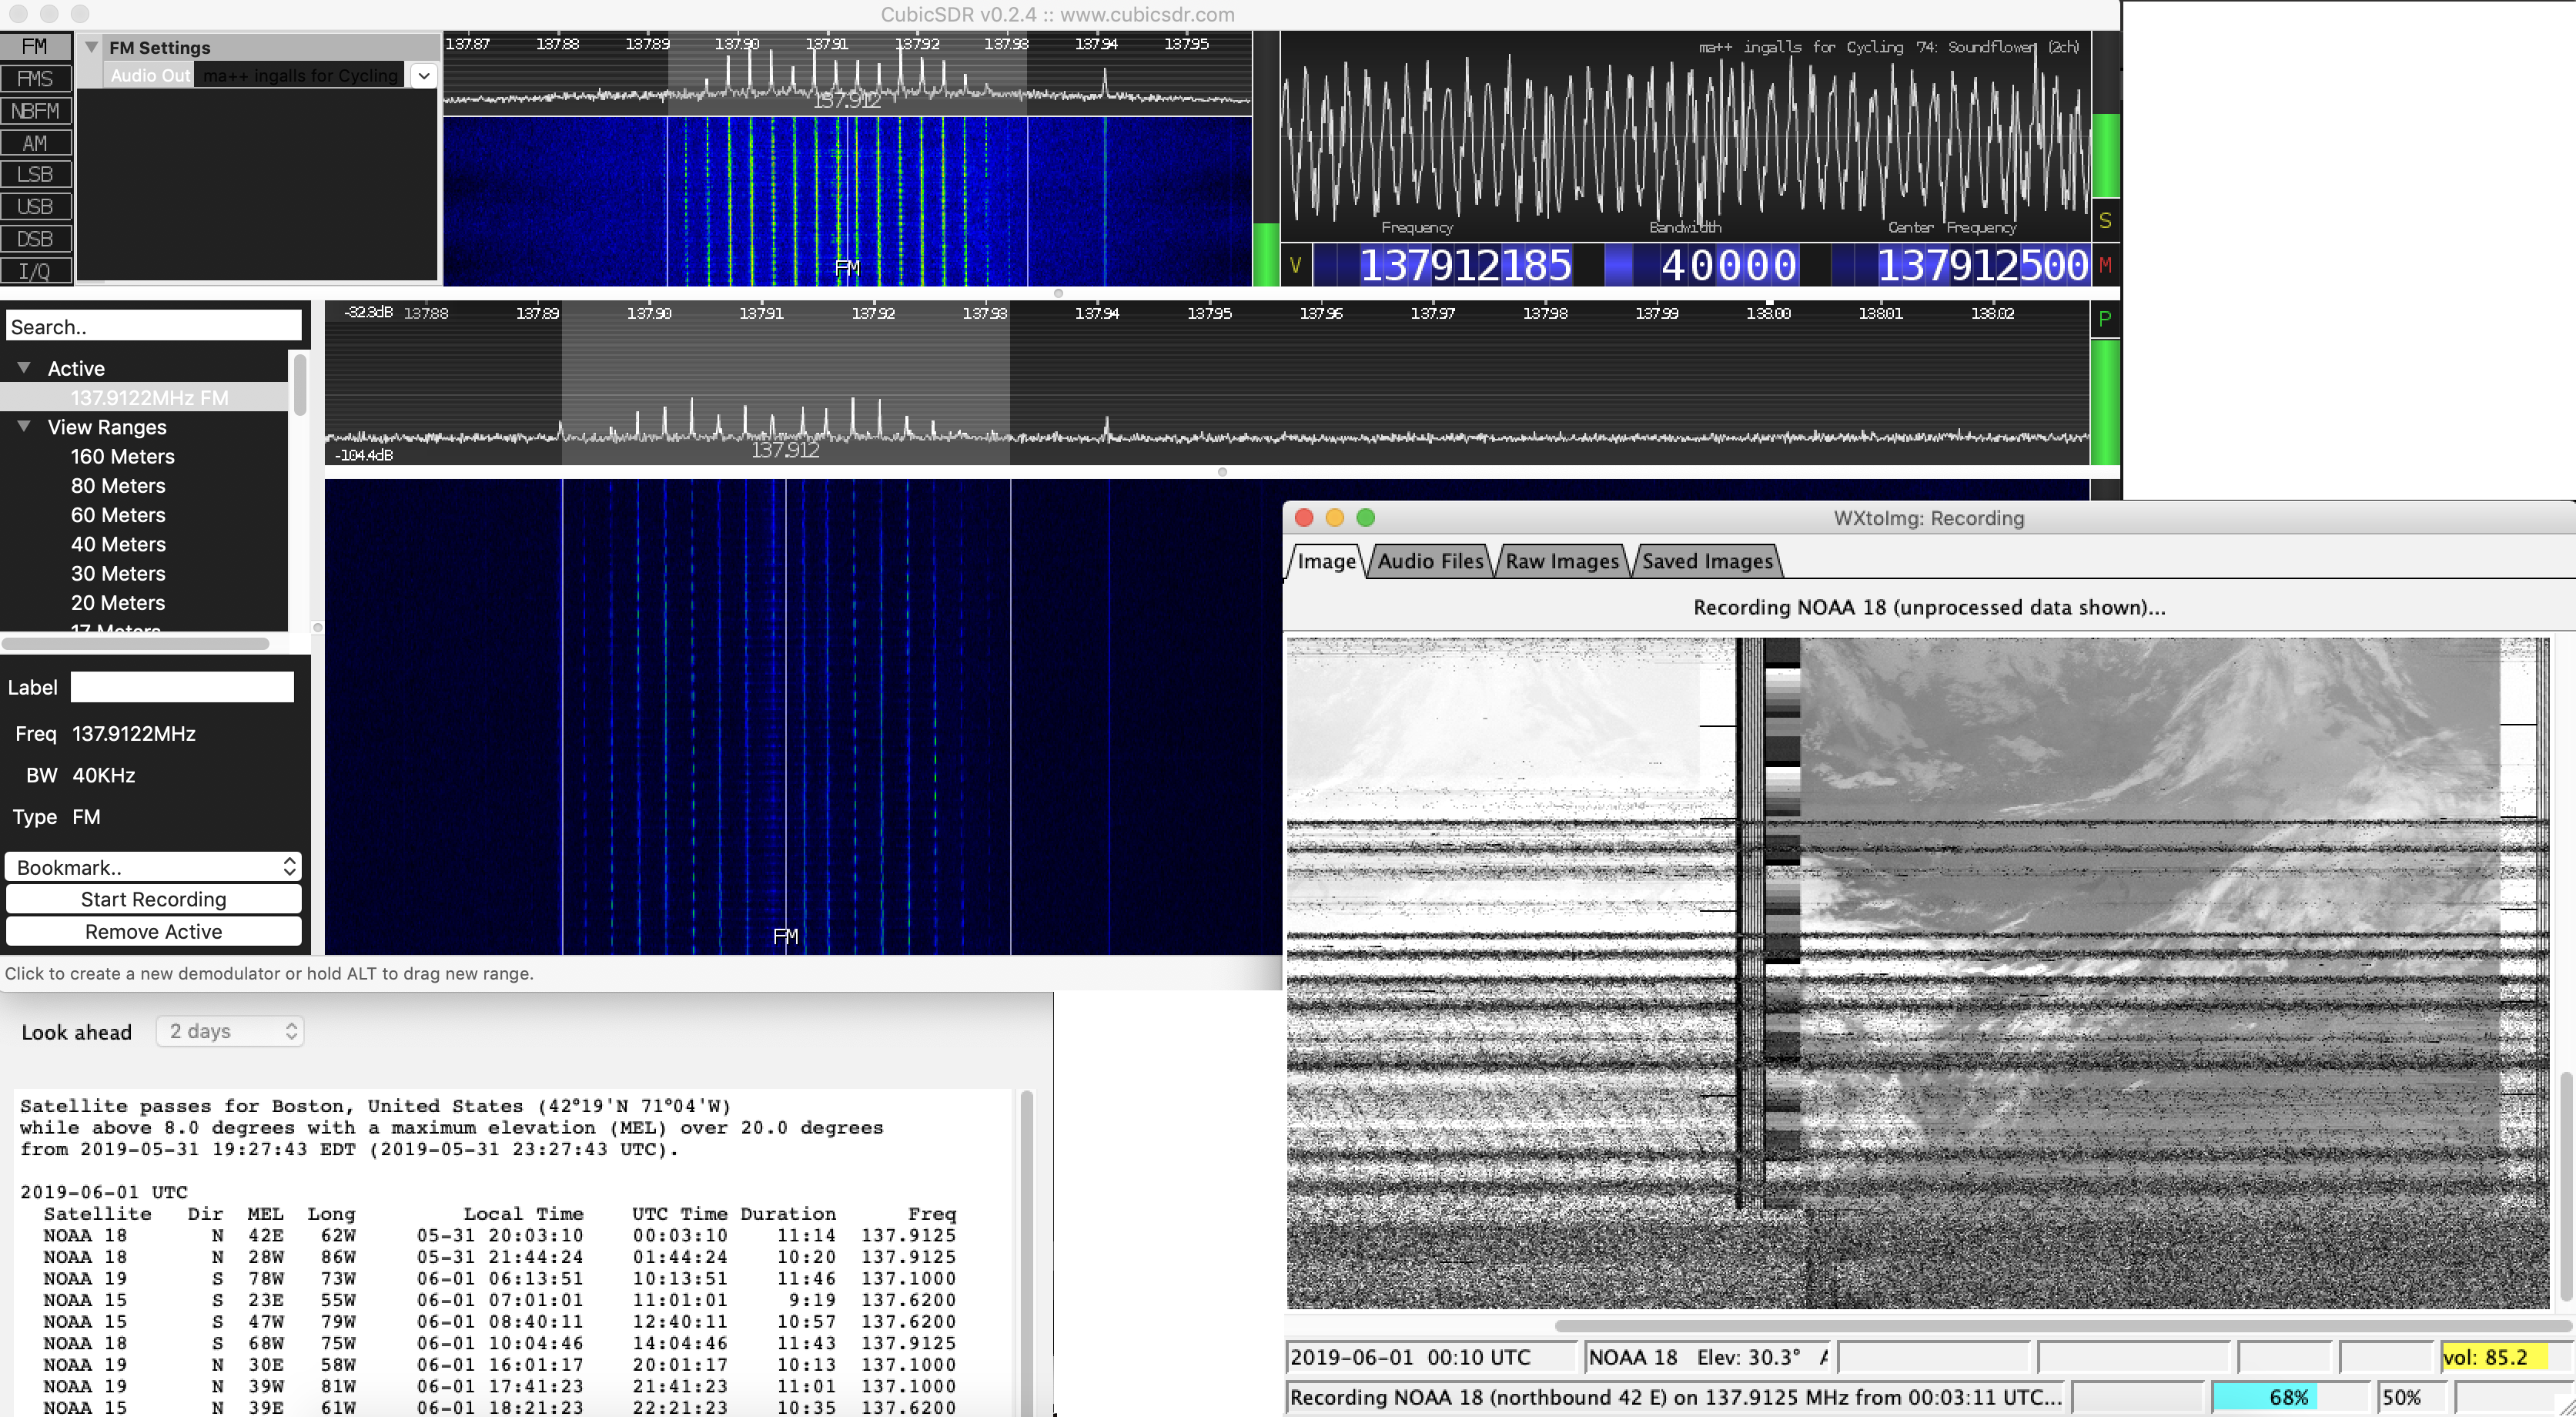
Image Data - Unmodified
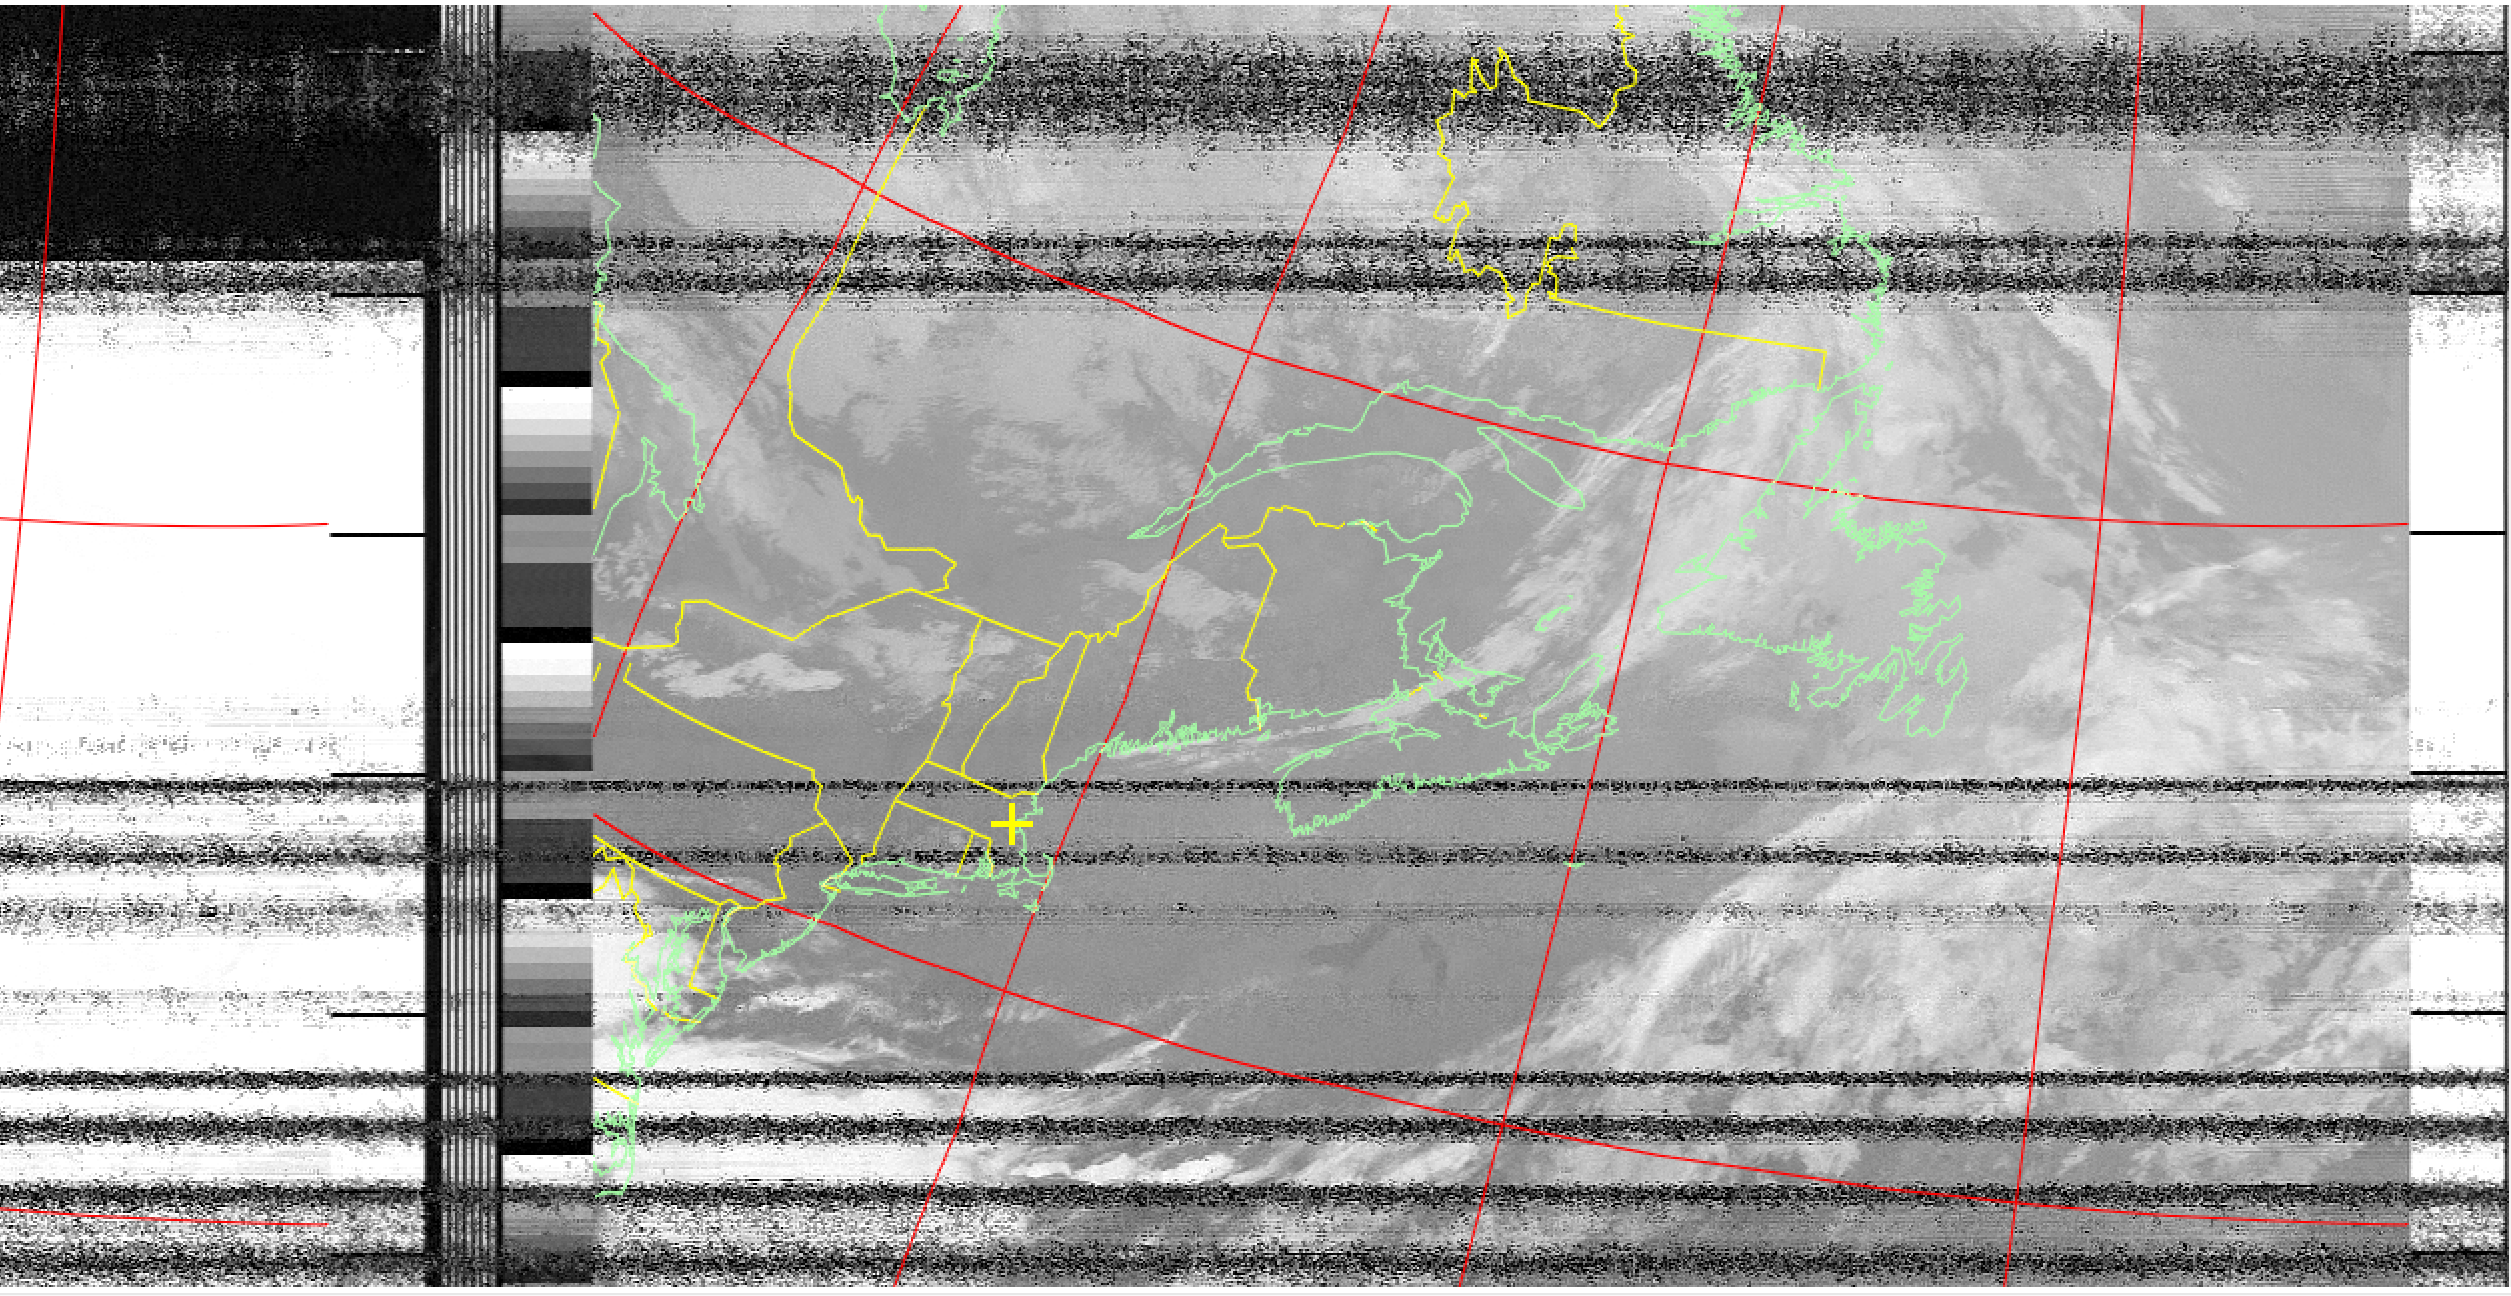
Image Data - HVCT False Colour (NOAA)
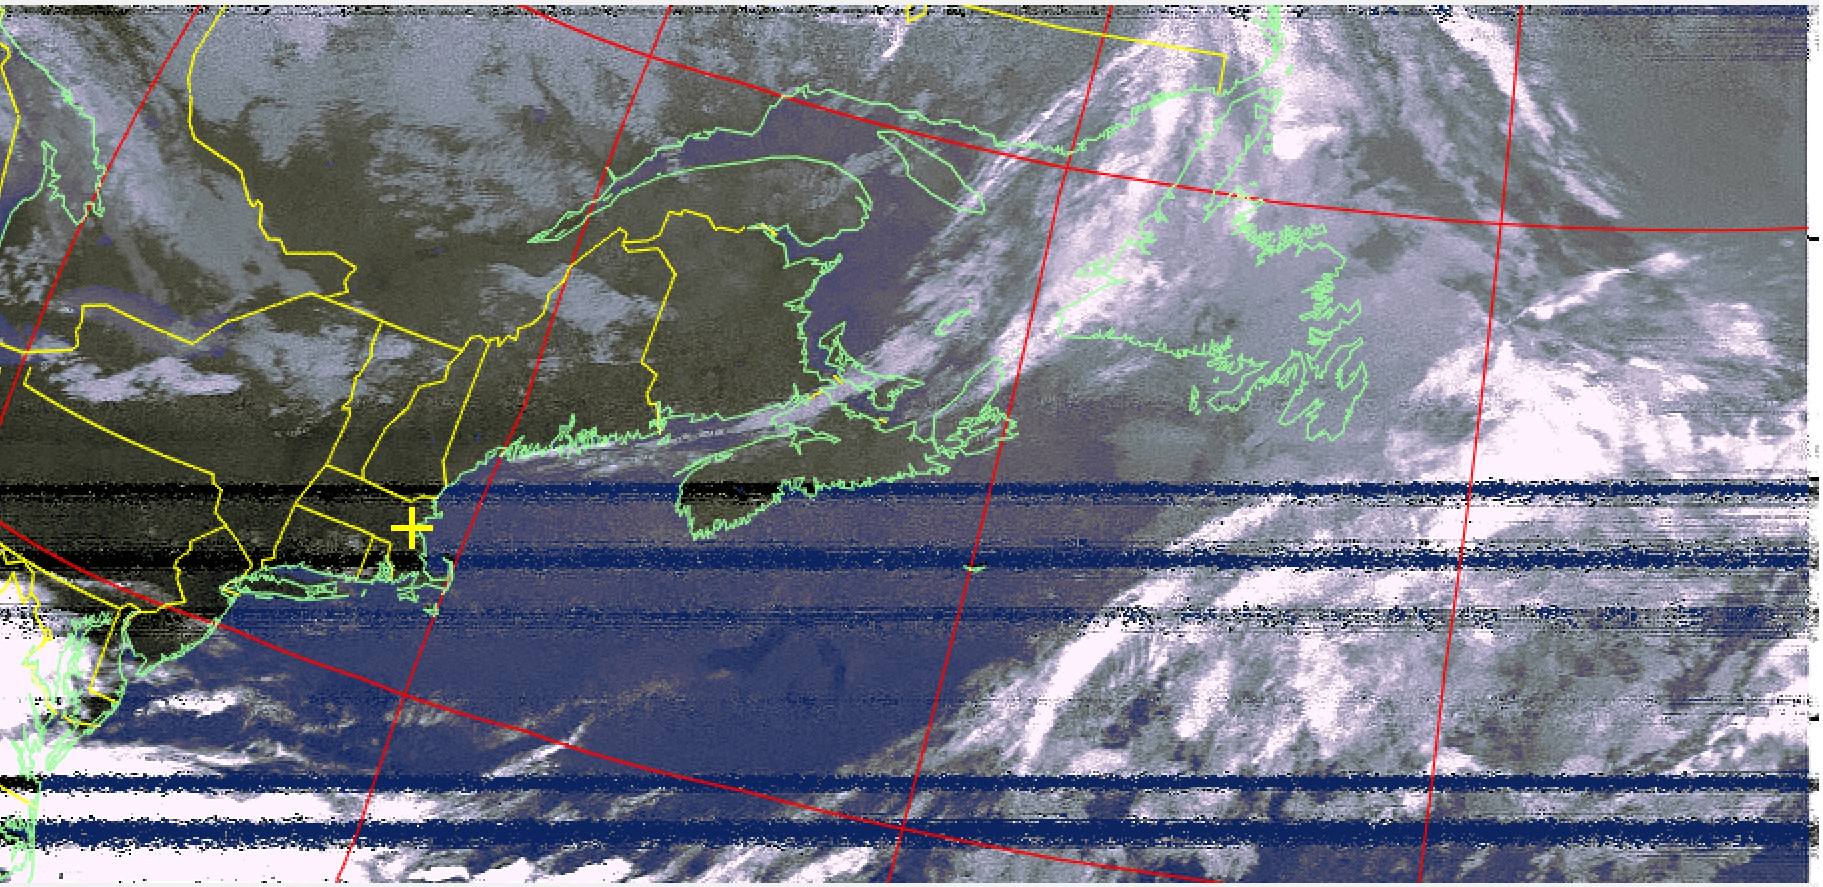
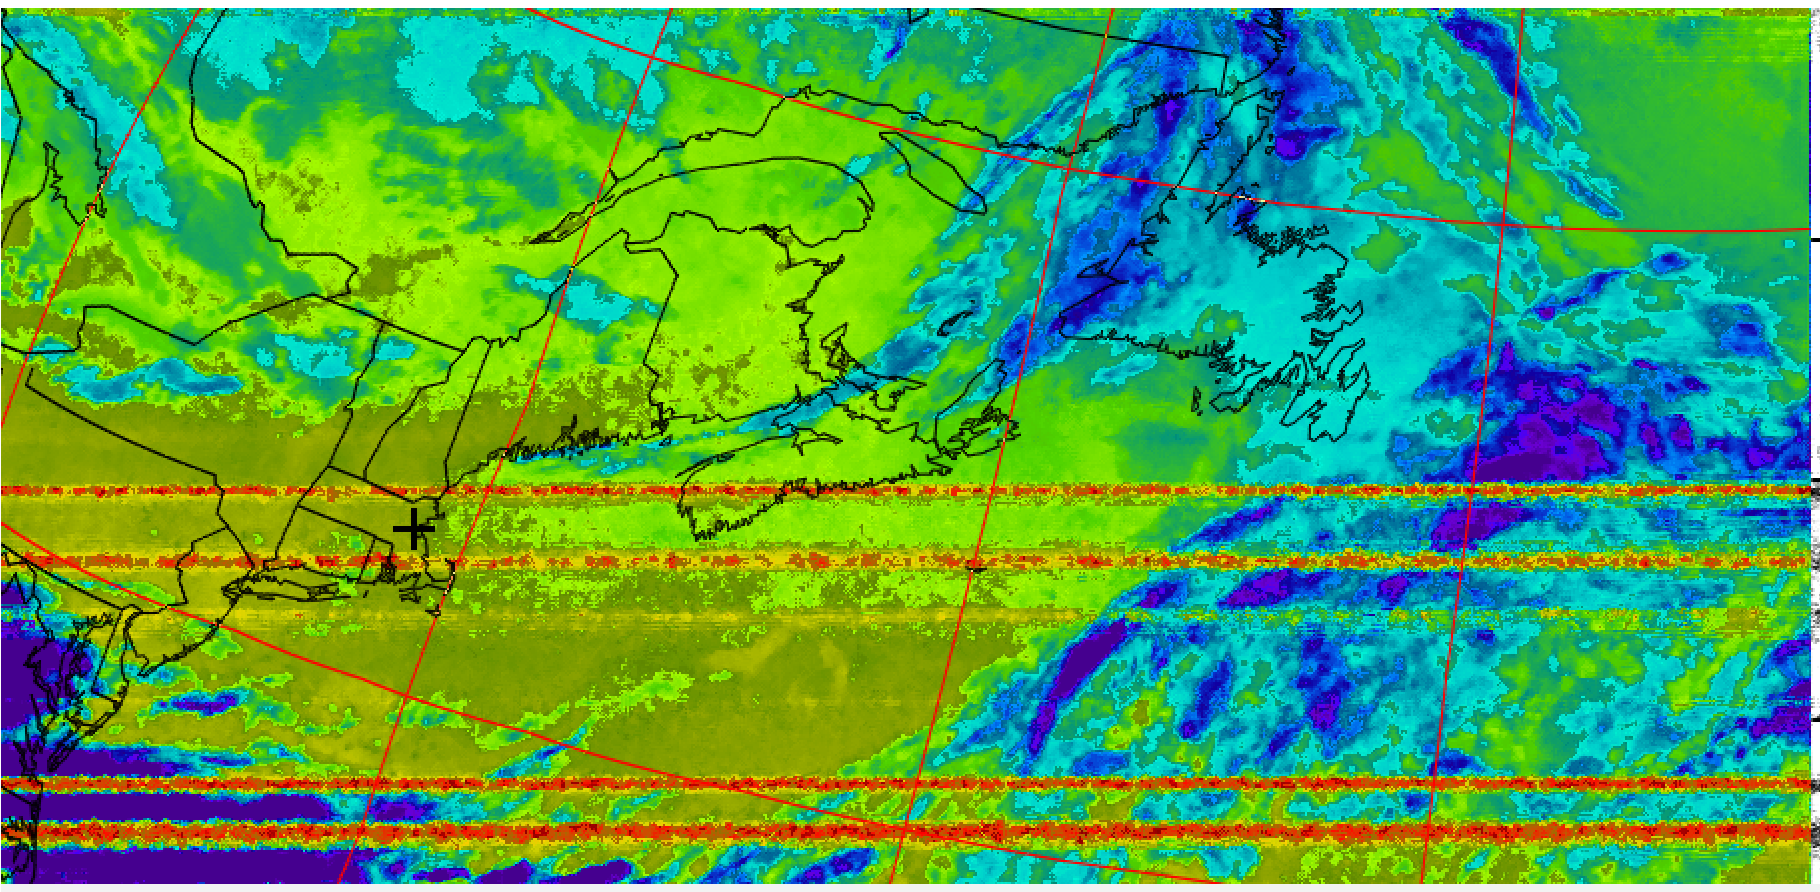
Image Data - Thermal
Credit
The above tutorial was pieced together with some information from the following sites/resources: